Wednesday, September 20, 2017

Procedural Content Generation in XSPelunker (MSX)

A few weeks ago, I finished my second entry for the MSXDev'17 competition, XSpelunker, a roguelike platformer for MSX heavily inspired by the amazing Spelunky, and with some touches from Opera Soft's "Livingstone Supongo".  For those of you who are not familiar with the MSX, it is a family of compatible 8bit computers released in the early 80s. The target computer for XSpelunker is an MSX1 with 16KB of RAM, and an 8bit Z80 CPU at 3.56MHz. Screen resolution is 256x192 pixels, with a color palette of 16 colors. So, do not expect to see Call of Duty here! :)

If you have not seen the game, here's a short video showing the intro and some gameplay:


One of the main features of XSpelunker is that levels are generated using Procedural Content Generation (PCG). So, each time you play a new game, levels are different from the last time you played, and you need to find your way to the exit again. In this blogpost I just wanted to explain how did the PCG algorithm of XSpelunker works, now that it's fresh in my mind! :)

(spoiler alert, it works VERY similarly to how the original Spelunky generates levels)

The key idea is to use a set of "preauthored chunks" and then recombine them randomly to form new levels (this is also how Spelunky generates levels). For example, here are some of the chunks used for the jungle levels of the game:


So, for each type of levels I wanted to have in the game, I just had to author a set of chunks. One problem of combining them randomly, however, is that it might result in levels that contain no valid path from the beginning to the exit of the level! In order to address that, we need to introduce two new concepts: "chunk types" and the "level path".

Chunk Types

In order to let the game generate levels that ensure that there is a path from start to finish of the level, I labeled each chunk with a "type". This type determines things like:
  • Special chunks: originally I had all chunks be 16x16 tiles in size. However, some puzzles I wanted to create required a larger space than that. So, I have some chunks that are 32x16 and others that are 16x16. 32x16 are SPECIAL chunks that are used differently than REGULAR chunks, which are 16x16.
  • Where in the level can this chunk be placed (for example, chunks like the left-hand-side one above only make sense if they are at the bottom part of a level because of the water part). So, chunks can be labeled as: TOP, BOTTOM, or ANYWHERE
  • Layer: levels are generated by stacking two layers of chunks one on top of the other. One layer contains the "background" (the foliage that you see at the top of the jungle levels, or the candles you see in the ruins levels), and the "foreground" (walls, platforms, etc.). I have a few BACKGROUND chunks to create a background, and on top of that, I overlay FOREGROUND chunks that define the level proper.
  • Connections: some chunks allow the character to navigate form left to right, others only allow the character to go up, etc. So, I defined six types of chunks depending on the paths that they allow the character to take:
Also, chunks of a given type might allow more than the necessary paths, but at least they need to guarantee that these paths are supported.

So, for example, the three chunks shown above are (from left to right):
  • REGULAR-BOTTOM-FOREGROUND-TYPE4
  • REGULAR-ANYWHERE-FOREGROUND-TYPE1
  • REGULAR-ANYWHERE-FOREGROUND-TYPE3

Level Path

Now that we have each chunk classified into a type, the game can now reason about which chunks to use if it wants the character to be able to follow a specific path. So, the first step in level generation is to generate a path. Let us assume that we want to generate a level of size 4x4 chunks. Generating a path involves the following steps:


Now, we know the type of chunks that we can use for each section of the level. Those sections without constraints (marked as "-"), can use any chunk, and those with constraints can only use chunks of the designed type.

Adding Chunks


Background: Once we have the path, the next step is to generate the background. The only constraints that are used are that chunks need to be BACKGROUND, and also TOP and BOTTOM chunks can only be at the top or bottom of the level respectively. After this, we will have the empty canvas of a level, that might look like this (you can see some foliage at the top already nicely formed):


Special Chunks: After that, notice that there might be lots of sections si the level that do not belong to the path (marked as "-" above). Those are sections where we can spawn SPECIAL chunks. So, the next step is to look to see if there are any two side-by-side "-" sections in the level. If there are, then there is a small probability of selecting a SPECIAL chunk to occupy that space.

SPECIAL chunks always contain one of the "kick-ass" items of the game (boots, shield, bow, mask, gun, or belt). Notice that since we are generating them off the path, there is no guarantee that there will actually be a path to get those items. So, if the player wants to get them, she will have to find her own way there!

Regular Chunks: After SPECIAL chunks, REGULAR chunks are put in the map. Every location where no SPECIAL chunk was placed needs to have a REGULAR chunk. The game uses the constraints defined by the path, and selects one chunk at random from all the chunks in the chunk library that satisfy the constraints. At this point the level will look something like this:


Notice that the level does not look very good yet. We see that some tree trunks are cut half way through for example! That will be fixed in the next step.

"Beautifying" Levels 


In this step, the game goes through the level and fixes some aesthetic aspects of the levels. For example, in the jungle, it completes all the tree trunks all the way to the top of the screen. In other sections of the game, there are other elements such as ropes or beams that need to be completed as well.

Another detail that is added in this step is a small marker for the exit of the level (the small yellow arrow).

After beautifying the previous level, it'll look like this:


Which starts looking better, but still looks quite empty, since there are no enemies, items, or anything else!

Spawning Enemies and Items


Some chunks are annotated with places that are good "item spawning" spots. So, at this point, any of those items are added to the map. For example, some chunks have a spot marked as SUPPLIES, which is translated to either a rope, a bomb, a stone or an arrow.

In addition to those, every horizontal surface of the map has a small chance to spawn a rock or an arrow.

For enemies, each enemy has a specialized routine that determines where is it a good spot for spawning it (for example, monkeys only get spawned in tree trunks, piranhas in water, bee nests hanging form a wall, etc.).

After enemies have been spawned, the game checks to see if a minimum number of enemies has been spawned (since the randomness of the process might result in levels with very few enemies). If not enough enemies were spawned, this step is restarted until enough enemies are generated.

Once the level is generated, it is ready for use in the game! A small routine goes over the map identifying those tiles that need an animation (water, fire, etc.) and adds the necessary data structures. After that the game starts!

The Different Areas of the Game


The above process explains how jungle levels get generated. To generate levels for the other two sections of the game, some steps are slightly modified in order to slowly increase the difficulty.

For example, in the "Ruins" levels (2-1, 2-2, 2-3 and 2-4), one of the chunks of TYPE 5 is actually missing a connection (on the top-right). So, whenever that chunk is spawned there is a chance that there is no direct path to the exit. So, the player will have to use ropes/bombs to create a path.

In the final levels (3-1, 3-2, 3-3, and 3-4) there is one final twist: in addition to having a chunk missing a connection, the bottom part of the levels gets filled with water. So, if the path happened to go through there, then the player will have to either go through water, or find a different path. This might result in some pretty hard levels. But it usually is not a problem, since, if the player makes it to levels 3-*, usually she is loaded with bombs/ropes or even might have the diving mask, with which the last levels are much easier.

The last level (3-4) in particular has a very particular shape (if you made it there, you'll know!), and unless you are prepared, can be VERY difficult. But, once you know what to expect, it's really not that hard. But I won't say more, since otherwise, I'll spoil the fun of figuring out how to beat the game! hahaha

So, that's pretty much it at a high level. That's how levels are generated (not much different than the way Spelunky does it!). So, no need to read more if you just wanted to have a high-level idea. If you want to know a bit more of the implementation details, then you should keep reading :)

MSX Implementation Details, Memory Usage, etc.


Let me start by explaining what is the usual tool chain that I use for creating MSX games. I created a diagram that I thought would explain it better, but after I drew it, I am now unsure if it helps. But in any case here it is:


So, the bottom line is:
- I draw graphics (e.g. tilesets) with GIMP
- I then load the tilesets with TILED to author level chunks, which get saved to TMX files (which are xml files).
- I then use a small Java script to translate these TMX files to the binary file I use in the game
- These binary files are then compressed using Pletter, and built into the ROM compiled with Glass.

Also, a few times I've used the OpenMSX Debugger, but I'm still not very familiar with it, so, I only use it when I'm desperate! But anyway, I would be really curious to hear which development tool chains other people use! :)

Level Chunks: All right, now that we have that out of the way, let's get back to PCG for XSpelunker... Consider the Jungle level generation process. For this, I defined exactly 26 chunks (you can see them in github in the data/rooms-jungle folder). When converted to assembler, a chunk looks like this:


So, when compiled into the ROM these 26 chunks would use a whopping 7272 bytes!

Remember that I wanted to fit it all in a 32KB ROM, so, if just chunks for the jungle use this much, if we add the chunks for the ruins, and those for the inner ruins, that'll be about 21KB just in chunks, leaving only 11KB for the rest of the game... that was not acceptable.

Compression: An obvious way to reduce space is to use some form of compression (e.g., what you'd do with a ZIP file in your modern computer). In my first game, naively I just implemented my own "compression" code (using a simple Run Length Encoding scheme, which is not technically even considered compression, but "encoding"). But folks at the msx.org forums recommended me to use a better compressor, such as Pletter. So, that's what I am using now.

I considered two separate options for compressing the chunks:
  1. Putting ALL the level chunks into a single binary file, and compressing it.
  2. Compressing each level chunk separately.
The advantage of the first is that I would save more space (since, it's well known that sizeof(compressed(A+B)) <= sizeof(compressed(A)) + sizeof(compressed(B))). The problem is that then to decompress it when the game runs, I would need to have 7272 bytes of free RAM, which I do not have...

So, I had to go with the second alternative, compressing each chunk separately. This uses more space in the ROM, but I do not need to decompress all the chunks at once, and thus worked better for XSpelunker.

(beginning of off-topic paragraph)
Finally, about compression, I just wanted to say that it is very easy for us in 2017 to use compression and pack a lot of features into a very small cartridge, compared to what the guys in the 80s did. But we must have in mind that compression algorithms are quite recent: the common LZW algorithm is from 1984, and DEFLATE (usually used in the ZIP format) is from the early 1990s... So, clearly game developers from the 80s did not have easy access to these technologies! There were compression algorithms dating back to the late 70s, but I am not sure that (given there was no Internet back then) it was easy for game developers to actually know about them. So, all of this is just to say that when we compre modern homebrew MSX games, I would not compare them to older games, since the comparison is unfair: we have way more resources nowadays than they had. So, creating an MSX game in 2017 is much easier than it was back in the 1980s...
(end of off-topic paragraph)

Chunk Simplification: However, even after compressing each chunk, that was still using too much space. The problem is that chunks contain complex patterns that do not compress very well. So, the solution was to simplify how chunks are stored. What I did was this: instead of authoring a chunk exactly as it would look in the game, I would just author a "skeleton of the chunk" that would be enough for then reconstructing the chunk in the game. I think it's better explained with an example.

Here you can see a chunk how I want it to look in the game (left), and how I ended up authoring it (right):


As you can see, what I have done is this:
  1. Since there is a piece of code that completes all the partial tree trunks anyway, I only need to add the bottom of a tree trunk. No need to have the rest.
  2. The solid rock part contains many different types of tiles (tiles with grass, edge, tiles, etc.). What I did was to just use a single type of rock tile, and then write a small assembler routine that would replace those by the proper tiles. The routine was smaller than the amount of space I saved by this, so it was worth it.
The result are chunks that are use less space after they are compressed! So, after all of this, the 26 chunks that originally were 7272 bytes, ended up occupying only 1453 bytes in the ROM. Which is more acceptable!

Level Progression: Once everything was setup, the level generation function takes in a set of parameters: size of a level, probability of appearance of each enemy type, which level chunks are available, minimum number of enemies, etc. So, in order to create a level progression, I defined the following table:


where, for each level, I specify its parameters. For example, you can see that level 1, is a small "64x32" level (i.e. 4x2 chunks), where only the enemy types 1, 3 and 5 can be spawned (pinecones, piranhas and scorpions), and where at least there has to be 4 enemies.  Level two is larger (64x64), but has the same enemy types, and in levels 3 and 4, more enemy types can be spawned.

In that way, adding a new level to the game requires actually only 17 extra bytes. So, I went for 12 levels just for not making the game repetitive. But adding more levels is not a problem at all!

So, anyway, there you go! That's how the procedural level generation in XSpelunker works! It's not rocket science, but it was fun to create it, finetune all the parameters, level chunks, etc. so that the difficulty level was what I was going for!

This was a long post, but I just wanted to write it now when it's still fresh in my mind, before I completely forgot about how I did it, hahaha

And btw, if you are interested in PCG in general, you could check the book that some good colleagues wrote a few years ago: http://pcgbook.com or if you want to see experiments and cool things, head over to the http://www.procjam.com website!

Saturday, September 16, 2017

Making MSX Games

For as far as I can remember, making games or computer games have been a very important part of my life. I learned how to code very early in my life. I think I was a bit over 10 years old when I started copying BASIC programs from the computer manual onto my first computer, a ZX Spectrum +2. Of course at that age I barely understood some of the key concepts, which only became clear later on, but I could write simple programs that I called "games". A year later (around 1988), we acquired an MSX computer (a Philips VG8020), and I became obsessed with programming. I remember my parents would convince me to go out of the house with the promise of buying me a "new programming book" (I own dozens, but a few that I scanned can be found here).

So, I programmed games on my MSX, then on the Amiga 500 (using a BASIC-like language called AMOS), and then on PC. I remember I took a C++ programming book to a summer camp when I was 15, which I almost completely read there, and I could not wait to get back home to start coding!

But in any case, anyone who knows me knows that if you ever asked me "what are you up to these days?", I would always answer something like "Oh, I am making this new game that...". I always was thinking of a new idea for a new game. But of course, since that was before the Internet, I've lost almost all of the early games I did. However, making games came to a stop around 2007 when work became too intense and I could not find time to dedicate to coding games...

About a year ago, I was so overwhelmed with work (trying to get tenure) that I needed a way out. So, I decided that I would dedicate at least a half an hour a day to code games again. Looking around I saw that the "new thing" in the retro-games community was to actually code games for old 8bit computers, even releasing them in physical format, with box, cover art, etc. as if we were back in the 80s! That sounded extremely appealing to me and I decided to learn how to code for one of my favorite retro computers, the MSX! 

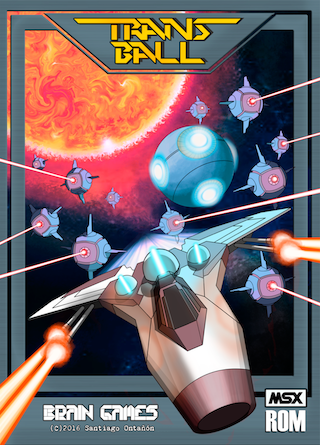
Although I knew it had been there for many years, I finally became active in the MSX community once again (even after about 35 years after the MSX computer was released, the forums at www.msx.org are still super active, with new posts every day!). When thinking about which game I would make, the choice was pretty obvious, since one of the games that I have coded again and again is a little game inspired by the classic Thrust arcade called Transball. I coded the first version of Transball for MS-DOS in about 1995, and have remade it since many times (Transball 2, Super Transball 2, Transball GL). So, I set out to create Transball on the MSX!

The MSX computer was a very powerful machine back in the day, but compared to modern computers is extremely limited. It features a Zilog Z80 CPU at 3.58 MHz (which is basically an extension of an intel 8080), 16KB - 64KB RAM (the one I owned had 64KB), and a screen resolution of 256x192 pixels with 16 colors. Games were loaded either using cartridges or using tapes (I swear I must have had in the order of about 100 tapes with games back in the day!). When I was thinking about it, just the title image of Super Transball 2 was larger than 64KB, so, how the hell can we fit a complete game in that space! (and leave some RAM space to actually run the game!). Later MSX machines (MSX2, MSX2+, etc.) were much more powerful, but I was going for the original MSX1!

Basically, the answer is that to make any decent game, it has to be coded at a very low-level, directly in assembler. So, I set out to learn Z80 assembler! At the beginning I thought that was crazy. I had heard that the Z80 wasn't even able to multiply! it could just add and subtract. So, If you wanted to multiply or divide, you would need to write your own routines! It sounded daunting initially, but it turned out that that was an advantage! The assembler language of the Z80 is so limited that it can be learned very quickly!

After trying different assemblers, and programming environments, I settled for just editing using Sublime Text, and compiling using the Glass Z80 compiler, which is a cross-platform Z80 compiler. The most complicated thing was how to start! How does one write the simplest possible assembler program for an MSX, compile it, and load it into a real MSX, or an MSX emulator to run it!

After searching for many alternatives, I settled for creating my game by compiling it into a ROM file (which is the emulator equivalent of a cartridge). A ROM file is literally just a file containing the bytes that would be stored in a cartridge that you would plug to your MSX. So, after seeing this example online of a "hello world" in assembler for the MSX, I figured out how to compile it, and run it in an emulator (I use OpenMSX, which is by far the best MSX emulator; some people like BlueMSX since it looks easier to use, but it's not been updated for years, and it's not as accurate as OpenMSX...):

CHPUT: equ 00a2h
    org 04000H
;-----------------------------------------------
    db "AB" ;   ROM signature
    dw Execute  ; start address
    db 0,0,0,0,0,0,0,0,0,0,0,0
;-----------------------------------------------
Execute:
    ld hl,helloWorld
Loop:
    ld a,(hl)
    and a
    jr z,Done
    call CHPUT  ; call the MSX BIOS to print a character on screen
    inc hl
    jr Loop
Done:
    di
    halt

helloWorld:
    db "Hello world!",0
    ds 8000h - $

If you want to try it, just type that into a text file, call it "hello-rom.asm", for example, then download the Glass compiler, and from the command line type:

java -jar Glass.jar hello-rom.asm hello-rom.rom

Open the generated hello-rom.rom file in OpenMSX, and there you go! you will see that in the screen the text "Hello World!" appears right below the MSX intro text. Exciting! Of course that call to the BIOS is ugly, and you are not going to get anywhere by drawing graphics calling the BIOS (if you want any speed, you need to do things a the lowest level, controlling every byte that is moved around), but it's a start!

Over the next few weeks I started learning all the stuff necessary for coding games for the MSX. How does the graphic system of the MSX work? How does one produce sound? How about input from the player? reading the joystick? etc. It was a long learning curve, that took several months, but before I knew it, I had it! I had a version of Transball running on a real MSX!!

The experience was amazing! Programming a game at such a low level in such a limited machine is like building a puzzle. When creating a game for PC, in my experience, the game is never finished! There is always one more thing that you want to add. On an MSX that is not the case: once you run out of memory, that's it. Game done. Adding one little visual effect there or one more sound effect is out of the question! And the memory fills up VERY fast! So, you basically have to figure out of how to fit everything you want to fit into the tiny amount of memory that is available.

For example, maps in Transball are usually 64x64 tiles in size, and each tile is stored as one byte in memory. So, to store a level, that's 4KB right there! I wanted to have 16 levels in the game,  so that would have been already 16*4KB = 64KB! The whole memory space of the computer for maps... However, the first 16KB of the memory is reserved for the BIOS, so that leaves you with 48KB only, and you also need to leave some free RAM to run the game. Usually the top 16KB are reserved for this, leaving you only with the middle 32KB of memory to store your game. So, 16 maps was not looking possible...

But, luckily, there are many tricks we can use to save memory space. And one of them is using compression (e.g., like when you compress a file as a ZIP). I used a very simple form of compression (which is technically not even considered compression in computer science, but "encoding"), called "run-length encoding", and with that I could reduce the space required to store all the maps to a reasonable amount.

The next problem were the graphics. You see a lot of people talking about "pixel art" on the Internet, thinking that the graphics they are creating are "like those in a NES console", or like a "ZX Spectrum". But when you actually need to draw graphics in the real thing (in this case on an MSX) you realize that it's much more complicated than using low-resolution and few colors. The MSX computer (and all computers of the 80s) had such a limited amount of memory for storing the graphics, that even if it can display 16 colors in the screen, you cannot arbitrarily choose the color of each pixel. In particular, in the "Screen 2" graphics mode, the MSX can only display 2 colors per each block of 8x1 pixels (and that's the most powerful one!). So, that turned out to be a huge constraint (and all the graphic artists of the 80s gained a renewed respect from me when I tried to recreate what they were doing back then!). And that is just one of the limitations, another is the limited number of "patterns" that can be stored at once in video memory, or the limited number of "hardware sprites" that can be displayed at once... but I won't get into the details!

And I will not get into how to create sounds for the MSX! Forget about samples! I will just say that to create a sound effect, you need to figure out the series of commands that you will want to send to a series of hardware oscillators and a white noise generator so that when they all act in combination, what comes out is what you expect! A lot of fun, but pretty hard at first! 

Since I was doing this for fun, I did not advertise my game at all until the day it was complete. When I had a fully-playable, reasonably tested version, I posted it on the MSX forums, just to see if people would play it, and that was the beginning of a ride!! I got a flood of messages with feedback, feature and bug requests, some people even went over the code and helped me optimize parts of it to save space for new features! The final product was a decent game (for being my first on MSX!) that looked like this:


Of course, graphics are terrible, and there is no in-game music, but the game is a lot of fun once you master the controls of the ship! (being a Thrust-like game, it's pretty hard to learn at the beginning if you have not played Thrust before!). Also, think that this is running on a computer that was released in 1983! 

A few weeks after that, I was contacted by the people of repro-factory to create a physical edition of the game (and that was something I wasn't expecting!). An amazing artist (Cesar Rincón Nadal) created a cover art, and the final product looked like this:


Which is amazing if you ask me!!!

So, there you go, that's the story of how I decided to code games for the MSX once again, after nearly 30 years! After Transball, I've now completed two more games for the MSX: Tales of Popolon and XSpelunker. Of which Tales of Popolon also has an amazing physical edition created by Matra, and with cover from Sergio Cabanillas! I am now considering which will be my next "retro game" project, another MSX game? an MSX2 game? perhaps a Spectrum game? who knows! :)

All of my MSX games are open-source, and can be found on my github page: https://github.com/santiontanon?tab=repositories

Next time I would like to tell you about how to Tales of Popolon and XSpelunker work under the hood!

santi

Wednesday, August 15, 2012

Game Tree Search for RTS Games

Thanks to the Starcraft AI competition, and after a conversation with my PhD student (Alberto Uriarte), I recently started thinking about applying game tree search (the family of techniques used to play Chess and Go) to RTS games.

The main problem is that standard game tree search techniques, like minimax, of alphabeta search, assume turn-taking, fully-observable, deterministic games. However, RTS games are real-time, partially-observable and non-deterministic. Additionally, RTS games have a tremendous branching factor (exponential with the number of units in the game at any given time). For that reason, those techniques cannot be applied directly. I decided to go step by step, and address only one of the problems: the fact that RTS are real-time.  This problem can actually be subdivided in 3 more basic problems: actions are durative, players can execute actions simultaneously, and there is not enough time to do search (each game cycle is only a few milliseconds).

I developed a simple variation of minimax (that I called RTMM, for Real-Time Minimax) that was designed to address the first and the third of those three (durative actions and not enough time to do search), and wrote a quick paper with it for the AIIDE conference. Unfortunately, I guess I wrote it too hastily and got rejected :)  Funnily enough, there was another paper submitted to the same conference with the same idea, but the other authors had also tackled the problem of simultaneous actions, so I guess it's just fair that their got accepted instead :) However, even if that paper is now unpublishable, I still think it's an interesting read, so I uploaded it to Arxiv for the records ( http://arxiv.org/abs/1208.1940 ).

In order to test my algorithms I created a very simple RTS game, that I call microRTS, and made it open source in Google Code. microRTS is designed just to experiment with real-time game tree search, so it is still deterministic and fully-observable. Since then, I've been toying with techniques to address the extremely large branching factors that arise in these games (it's not rare for a state to have several million possible moves). I plan to write a paper soon with my findings. But meanwhile, microRTS is out there and if anyone is interested in using it for research, just send me an email, and I can provide support. In the SVN repository I included about a dozen AI techniques prebuilt with the game (most of them based on game tree search, or in Monte Carlo sampling), so you can easily test how good is your AI.

Here you can see a screenshot of microRTS in a small 8x8 map:


Wednesday, November 16, 2011

Stanford AI Class

During the past few weeks I've been following the video lectures that Sebastian Thrun and Peter Norvig post every week, and that constitute their "Introduction to Artificial Intelligence" course.

I have to say that I love the course. Even if, as an AI researcher, I should know everything that they explain, it's nice to hear it again properly summarized and explained. What is more interesting about this course is that, given it's crazy amount of students (I've heard the count is about 160000!), it's generating lots of reactions among AI researchers. Some people love it, some people hate it. Here's my take on it.

I agree with many that the course is extremely biased (specially the machine learning part), and that only those techniques coming from probability and statistics are covered in the course. For example, the supervised learning module basically covers Bayesian learning, linear regression and nearest neighbor (and this last one is a nice addition!). This leaves out all the "search-based" machine learning methods (based on the idea of searching in a hypothesis space) like: version spaces or decision trees. This is an "introduction to AI" class, and I understand that they leave out the more fashionable topics like kernel methods. But I think that the search-based approach to machine learning deserves a module in this course. Whole fields (like inductive logic programming) come from this tradition of machine learning.

The same happens with the planning module of the course. Traditional introductory courses to AI use STRIPS planning to introduce the students to the idea of planning, and only tangentially touch on the problem of planning under uncertainty. However, this course does the opposite. Which is kind of weird. But here I don't have such a strong opinion as with the machine learning module.

Given the large number of students, and the strong bias of the course. Several AI researchers are actually angry at the course, since it's shaping the mind of a whole generation of potential AI researchers.

That said, I still think the course is awesome, and I follow it every week.

And I say this: all of those (and I include myself) who disagree with the way Sebastian and Peter teach their course should, instead of complain, just try to follow their lead and create an online course that represents their view of AI. Maybe we could even create a youtube channel for "missing lectures from the Stanford intro to AI course" :)

Saturday, February 19, 2011

LEGO tank with arm

After a bunch of conference deadlines all packed together I decided to take a break and have some fun building LEGO. This time I decided to create an arm. Not very pretty, but I'm kind of proud of the claw. If you are into LEGO technic creationg, check this out:

Wednesday, September 15, 2010

IEEE-CIG 2010

I recently attended the IEEE-CIG 2010 conference, which stands for the "Computational Intelligence in Games" conference, and I've to say, it was a very interesting experience. I've regularly attended AIIDE (the other game AI conference), but I had never been in CIG. I had the impression that the CIG environment was much more focused on games than in AI, and that made this conference really interesting from an AI researcher's point of view for the following reasons:

1) AI conferences are typically full with researchers (like me) that have a technique they believe in (case-based reasoning, support-vector machines,... you name it) and that are looking for problems they can solve with their technique. Typical "hammer looking for nail". In CIG it was the opposite. It was full of people explaining real problems they face in the creation of video games, and for which they were looking for solutions.
2) On top of that, given that a large proportion of the crowd were more game experts than AI experts, the range of AI techniques exhibited in CIG was quite narrow (as I will detail later). So, I think there are lots of opportunities for AI researchers looking for nails there.

Most of the papers presented some particular AI technique applied to some particular game. I did a rundown of all the 62 papers accepted and this is the histogram of AI techniques being used (not all papers were about AI, so the following numbers do not add up to 62):

- Machine Learning: 11 papers (3 on neural nets, 2 in reinforcement learning, rest on different techniques)
- Search: 7 papers (6 on game tree search)
- Planning: 1 paper
- Optimization: 18 papers (17 on genetic algorithms)
- Statistical: 3
- Game Theory: 2
- Logic: 2
- Scripting: 2
- Cognitive Approaches: 5 (2 on CBR/Episodic memory)
- Drama Management: 1
- Game Specific AI: 5

One quick observation is that there is a huge bias towards certain kind of approaches. For instance, there were 17 papers out of 62 talking about genetic algorithms. And out of all of the papers using some machine learning technique, the only 2 techniques to be used more than once were neural networks and reinforcement learning.

For instance, in one of the competitions held during the conference, the problem was to make an AI which would control a car, and be as fast as possible. The most successful approaches would first optimize a "race-line" using genetic algorithms, and then just have a hard-coded controller which would stick to that line when possible. The problem they faced is that driving a car is not just sticking to the race line: there are other cars in the game which have to be overtaken, etc. Thus, there are several behaviors that need to be modeled: sticking to the race line and overtaking. The AI community has solutions for these kind of problems where there are multiple competing behaviors, such as the subsumption architecture, or the more modern multi-agent bidding coordination mechanisms.

My conclusion is that we, as AI researchers, have a lot to gain by paying attention to places like CIG. On the one hand, we have the chance of contributing to the computer games community by bringing new techniques to the table, and on the other hand, the computer games community have a chance of contributing to the AI community by offering us challenging problems with which to push the limits of current AI techniques.

If anyone is interested, here's a quick list of the competitions that called my attention in CIG:

- Simulated Car Racing Championship: make an AI which races a car through a track with opponents as fast as possible. The problems involve both optimizing the trajectory, real-time control and handling unpredictable events (opponents). URL: http://cig.dei.polimi.it/

- Ms. Pac-Man Competition: create an AI agent which can play Ms. Pac-Man, problems: real-time decision making, non-determinism. URL: http://dces.essex.ac.uk/staff/sml/pacman/PacManContest.html

- Mario AI Championship: create an AI that can play Mario. In addition to the reactive control needed in Ms. Pac-Man, here you need high level planning, since there are levels which require some amount of puzzle-solving ability (e.g. you can only pass by first breaking some stones, and then jumping to a particular position, etc.). URL: http://www.marioai.org/

- The 2K BotPrize: a Turing test for first-person shooter bots, and with a cash prize! URL: http://botprize.org/

- StarCraft RTS AI Competition: if you think Chess is hard. Starcraft has a way bigger action and state space, it is real-time, and there is imperfect information. Good luck trying to create an AI for this! :) URL: http://ls11-www.cs.tu-dortmund.de/rts-competition/starcraft-cig2010

So, what's what I'd like to see next year at CIG? a more varied histogram of AI techniques, and a more varied set of entries to the competitions. I think this would provide a more interesting discussion and also help better understand which techniques are more suitable for which kind of game problems.

Friday, April 2, 2010

LEGO linear actuators

I've been recently playing around with the "new" LEGO linear actuators. They are pretty neat and mechanics can get greatly simplified thanks to them. Sometimes it removes a little bit the challenge, but it also increases the creative possibilities.

I created a simple 4-legged walker using 4 linear actuators to test their strength and speed, and I've to say I've been surprised at the quality of those actuators.  Here's a picture of the linear actuator in my robot:


And you can see more pictures and videos of it here